OK, so you’ve gotten past the basics of participating in a Zoom meeting, and you want to learn more. You can try any of these new skills on a call you’re on with friendly folks, or you can do a test meeting – just go to https://zoom.us, and choose “host a meeting” and you can be in a meeting all by yourself to test things out.
Note: You’ll notice several times I say “you MAY see.” That’s because Zoom displays a little differently depending on what device you’re on (PC, Mac, Chrome book, iPhone…) and on what settings your meeting host has enabled and on whether or not you have the most current update. So sometimes you just won’t have an option that I describe here. Use Zoom’s support guides for more information.
- Adjust who you see – Gallery or Speaker View
- Change Your Name
- Chat – Beyond the Basics
- Updating Your Zoom
Adjust who you see – Gallery and Speaker View
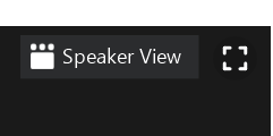
In the top right corner of your screen, you’ll see a toggle button which you can click on to go between gallery view and speaker view. (On a mobile device, swipe right for gallery view of some participants – keep swiping right to see more participants. Swipe left to see speaker view.)
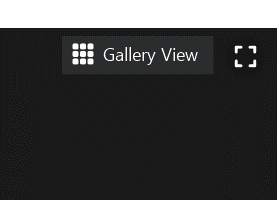
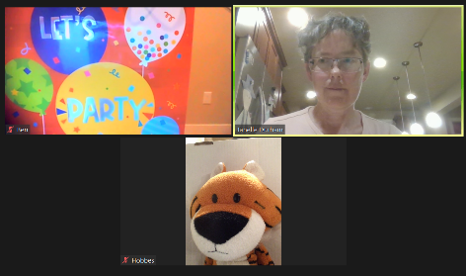
When you see images of several meeting participants, that’s called gallery view. The person speaking will have a yellow box around them.
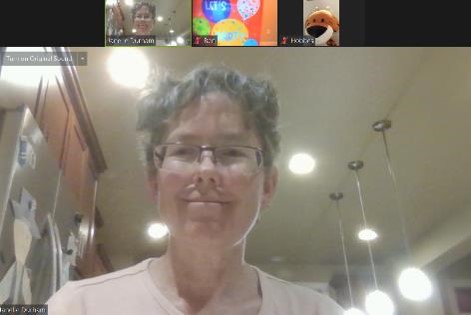
In speaker view, you see one large picture of the speaker.
In speaker view, whenever someone new starts speaking (or coughs loudly or has a dog barking in the background), the screen will switch to them. In some meetings, the moderator will “spotlight” the main speaker so they stay highlighted in speaker view even if other people are talking. (You can always switch your view back to gallery view by clicking on the words “gallery view” at the top.)
If you want to keep the camera on one particular person, you can “pin” their video – mouse over their picture – three dots appear in top right corner – choose pin. This only affects your view, no one else’s.
On a mobile device, gallery view will only show 4 people at a time. Some laptop screens will show 25. If you have a large screen and good processing speed, you can see up to 49 participants at once. If there are more people in the meeting than you can see, then move your mouse to the center of the screen on the right edge and a white arrow will appear – click there to see more people. On a mobile device, swipe right.
In gallery view, you can arrange people how you want – just click on their picture and drag them where you want them on your screen. This only affects your screen, but I find it’s helpful for things like remembering who has had a turn to speak.
Adjusting View during Screen Share
When someone is sharing their screen, their screen will fill most of your screen. You can adjust this.
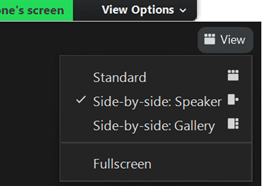
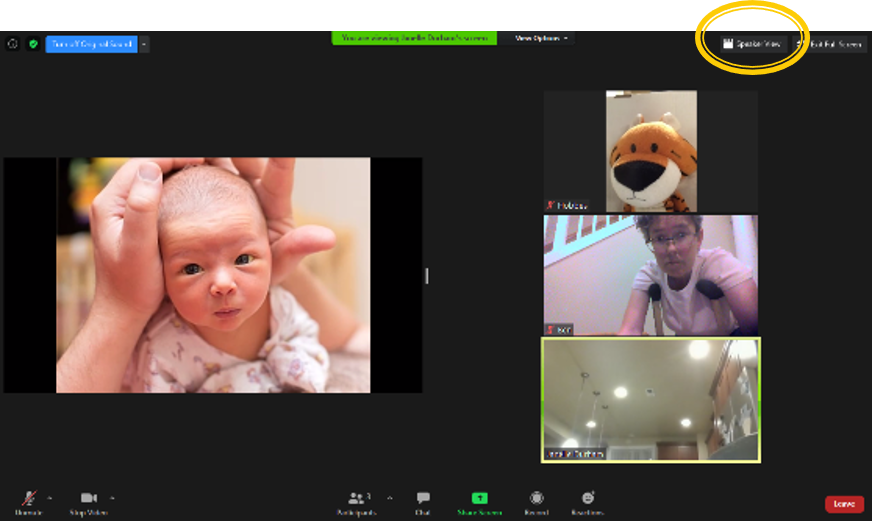
In the top right corner of your screen (next to the big green bar that says who is sharing), you’ll see something saying “view options”. If you choose standard, you’ll see the shared screen in the bottom portion of your screen, and a few camera images of participants across the top of the screen. If you choose side by side, you’ll see the shared screen on the left and participants on the right side.
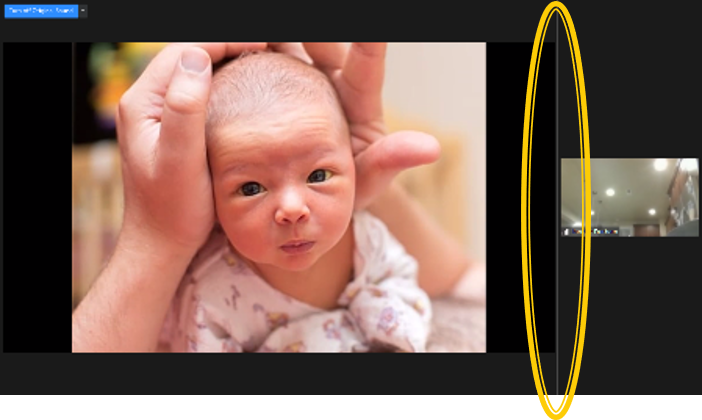
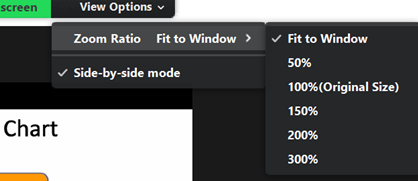
In side-by-side, you can adjust your screen to make the shared screen smaller so you can see more participants. Move your mouse cursor to be in the area between the shared screen and participant pictures – you’ll see a gray vertical line. In the center of that line, you’ll see two white lines. Click on that to move it till the screen is divided as you wish between the shared slides and the participants.
FYI, if you’re having a hard time reading something that is on the screen being shared, you can make your view of it bigger. In the view options, you’ll see something that says zoom ratio… if you chose 300% it makes the image much bigger and you can drag around your view of it to see exactly what you what to see.
Share Screen
Generally you won’t do this in a meeting you’re attending. I cover the basics in Hosting a Basic Zoom meeting, and have more details in the post on PowerPoints on Zoom.
Change your Display Name
At the top right of your image, you may see three dots. Click on those, and it will give you options, including “rename”. Click on that and type in the display name you want. Or: open the participants’ list. Mouse over your name, and it may display options to rename.
Chat – beyond the basics
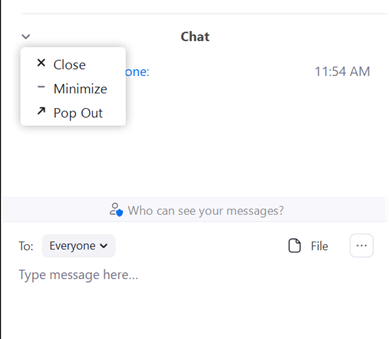
If you go to the command bar and click on chat (the cartoon word bubble), then chat may pop open in the right hand sidebar. (If you’ve got the participants list up, it will be the top half of the sidebar and the chat will be the bottom half). I often have a hard time reading long chats in this small format. If you click on that down arrow to the left of the word chat, it will offer you a menu where you can choose to close the chat (you can re-open it at any time) or minimize, or pop it out to be its own window which you can make as big as you want.
If it’s popped out and you want it back in the right sidebar, here’s how. In the chat window, see those three dots? Click on there to see the menu. (You won’t have as many options there if you’re not host.) Click where it says “merge to meeting window.”
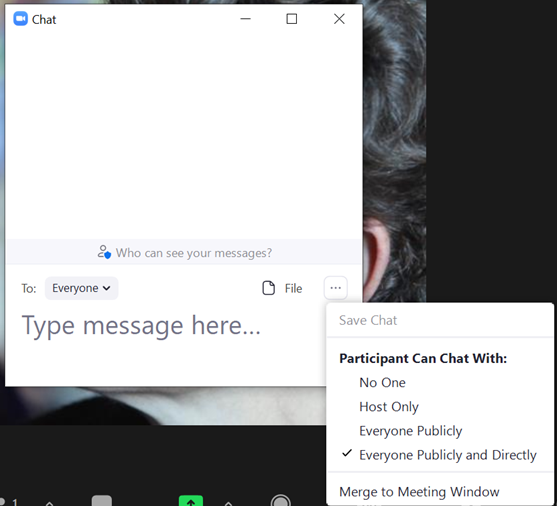
Some meetings will disable chat. Some will only allow you to chat with the meeting host. Some allow you to chat to everyone. Some allow you to also send private messages to one individual that no one else can see. After you’ve typed a chat, but before you send it, make sure you’re sending it to the person you mean to send it to! (In the picture above, it says “To Everyone” – make sure that it says “To Minnie Mouse” if you have something you only want Minnie to see.
You can save the chat… in the chat box, there’s three dots – click there and choose save. It will save it on your computer – in my case, it created a folder in my documents called Zoom, then creates a folder for the meeting and the chat is in there.
Tips: if you paste a link in the chat, then people can click on it to go to that website. You can also click on the word “file” in chat and it will let you send a file to everyone from your computer, google drive or one drive. (If the host has enabled that.)
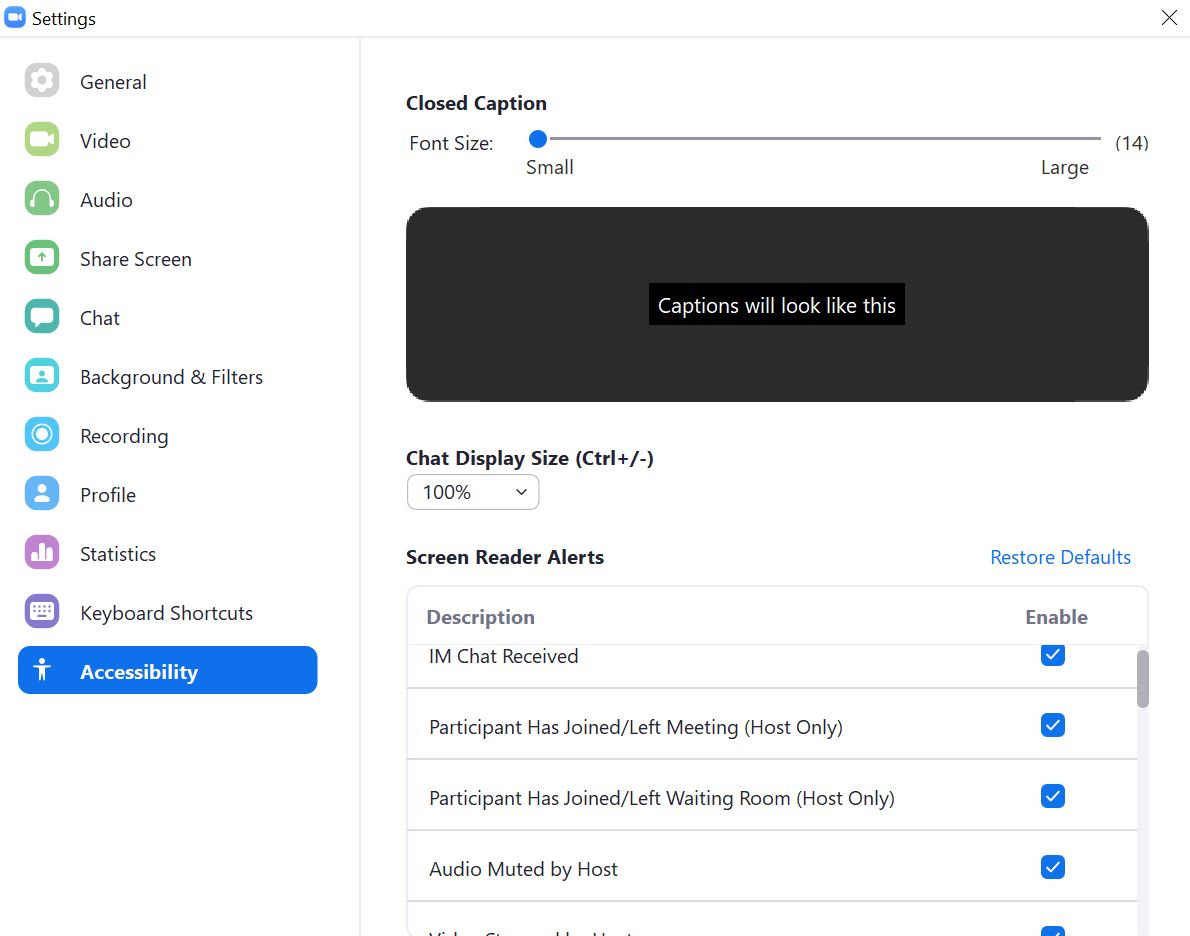
Accessibility – Large Print Captions and Chat
Are the words in chat and captions too small for you to read easily? You can fix that in your settings!
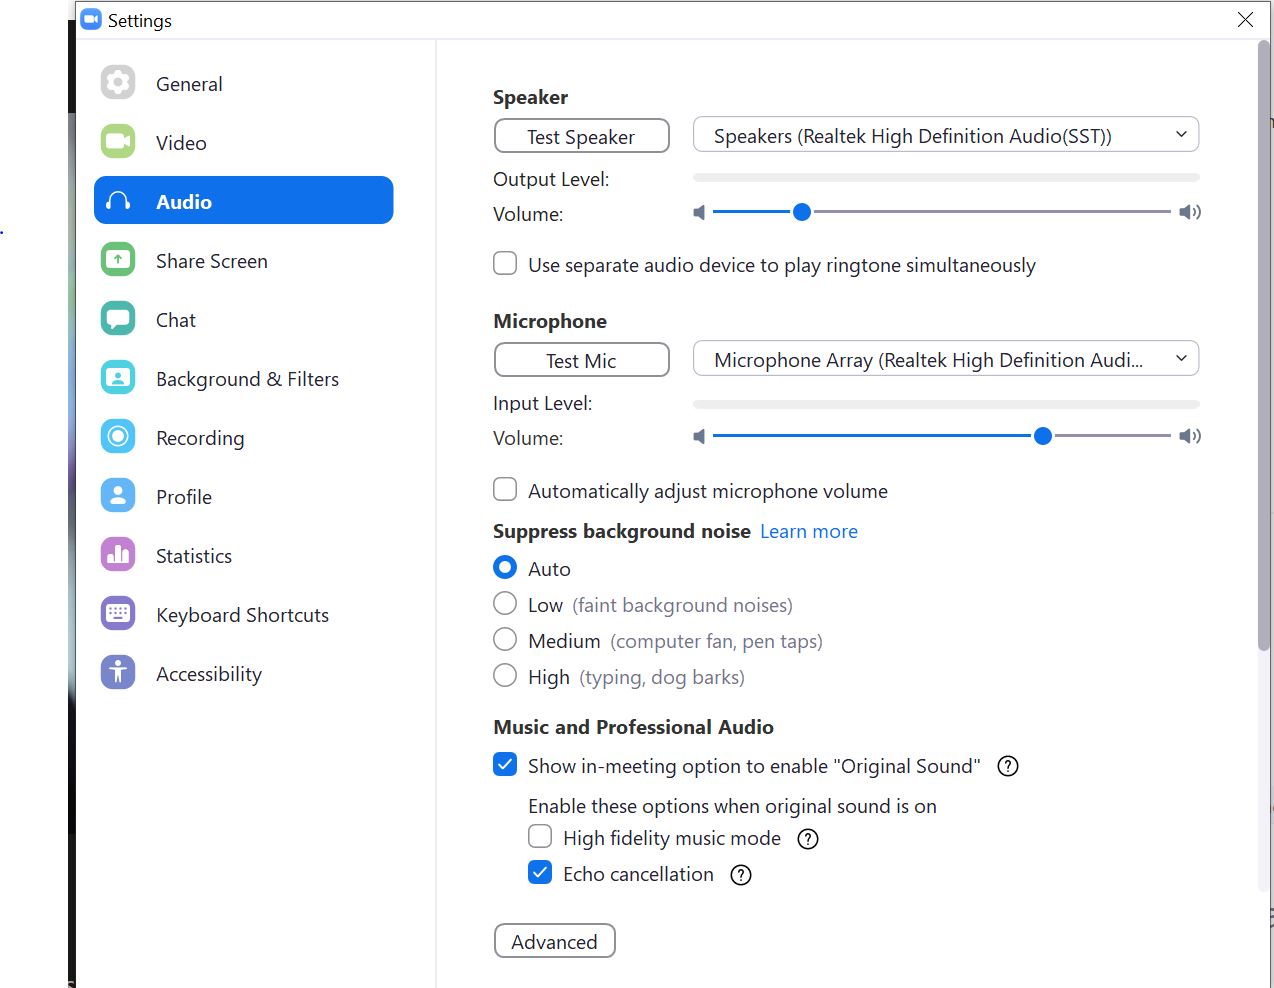
An easy way to get into your settings is: look at the microphone icon. Next to it is an up arrow, click there and choose audio settings. Then you’ll see this:
At the bottom of your left sidebar, it says accessibility. Click there, and it will give you the option to change the font size for your closed captions, or change the chat display size to be larger.
Updating your Zoom
Zoom is continually adding new features and trying to make improvements. I encourage you to check for updates once a month or so to make sure you’re running the most current version with all the best features.
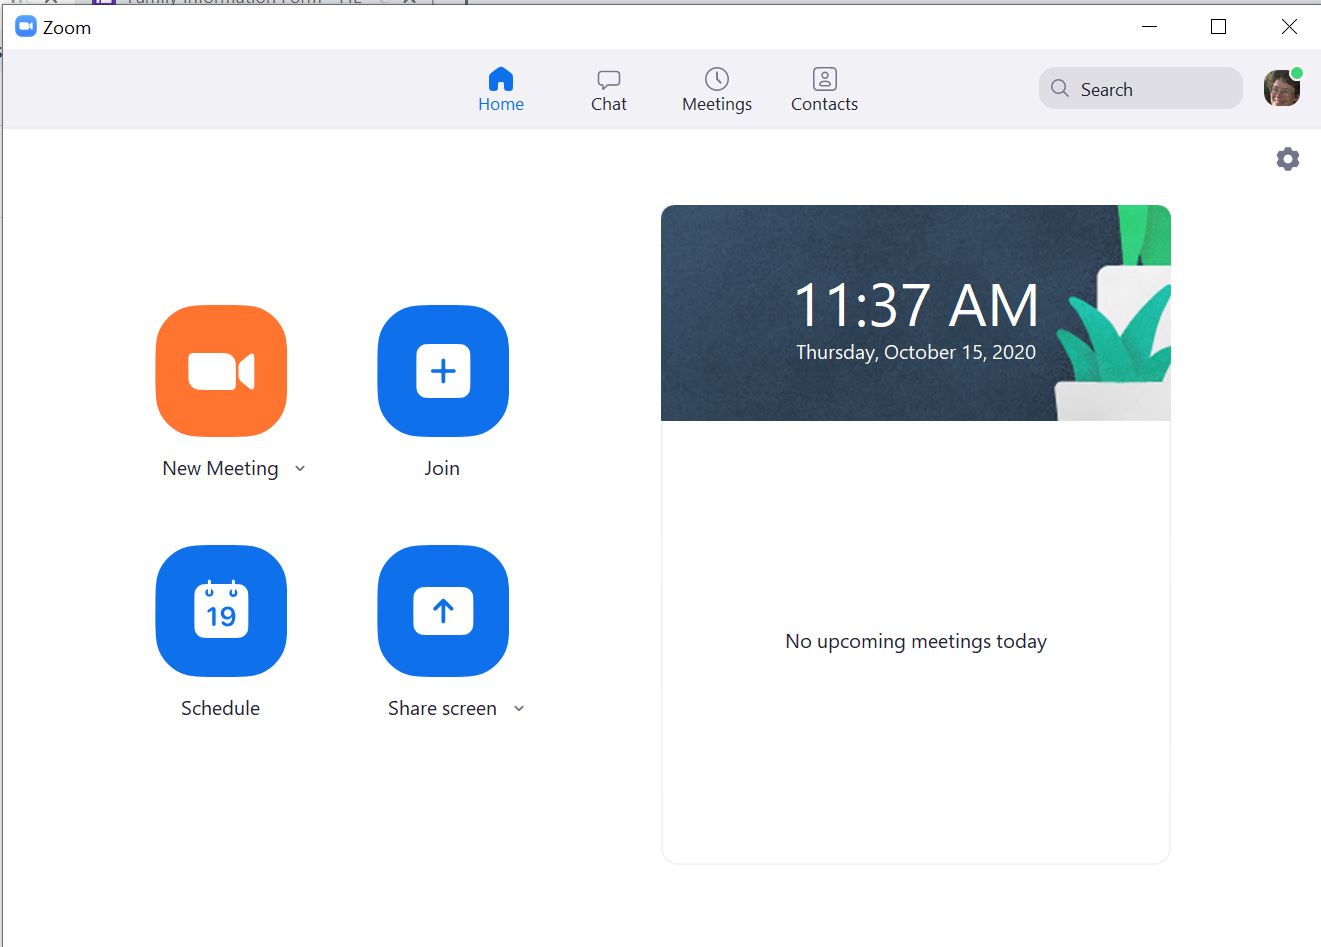
To do that, open the app. On a windows computer, you can click on the windows button to bring up your list of apps and then choose zoom (it’s near the bottom of the alphabetical list, or you can type “zoom” in the box at the bottom left where it says “type here to search”, then open zoom.) It will look like this:
Click on your picture (or your initials) at the top right. Choose “check for updates”. If there are any, it will say “update available” and you can download them. Then you’ll click on “update” to install.
Learn More
To learn how to use more advanced skills in Zoom, check out the other articles in my Zoom Guide. Here’s some to start with:
- Looking and Sounding Good on Zoom: finding a better internet signal so your calls don’t freeze, ways to improve your audio and video quality
- Hosting a Meeting (starting a meeting, inviting people, scheduling a meeting, security issues, muting, recording, and the basics of sharing screens)
Written in 2020-21. Checked in 2026 – Info is generally still all valid, though some things may look a little different.
